By Akshata Shanbhag
In these snap-happy times, you need all the help you can get to manage your photos.
We have shown you how to import, organize, and edit photos in Photos on macOS. Now let’s see what else you can do with the Photos app to keep your photo/video collection sparkling and up to date.
1. Set Up Folders
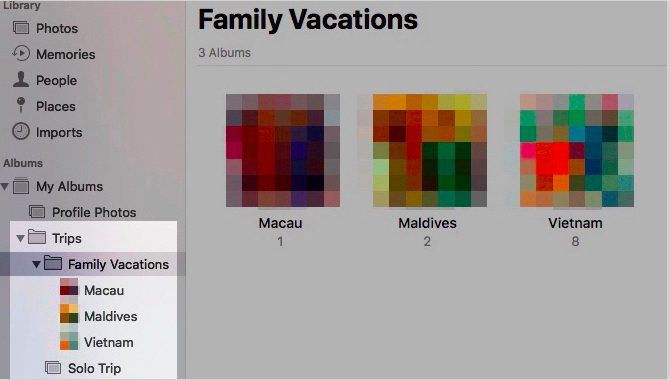
Photo collections can get out of control in a flash (no pun intended). But you can keep them sorted in Apple Photos by setting up folders. Click on File > New Folder to get started.
Albums and folders sound interchangeable. Are they? Not at all. Albums allow you to organize your photos and videos, while folders allow you to organize your albums.
Folders can have folders within them, and can have nested albums too. But albums cannot have child elements.
The folder structure comes in handy for managing collections of collections around a certain theme. Let’s say you have a separate album for every trip you have ever been on with your family. Then it makes sense to bring all those albums under a single umbrella, which can be your Family Vacations folder.
2. Tag People

It’s convenient if you can isolate photos of specific friends or family members. Photos knows this and eases the way for you by allowing you to tag people in photos.
The app automatically scans faces that show up in your photos and collects them in the People section of the sidebar. Double-clicking on a face displays photos in which that face appears, across all albums.
You can match names to faces by clicking on the Name option that appears when you hover over a face. Once you have tagged people this way, you can search for their photos by typing in their name in the search box.
We’ll interrupt with a word of warning here: while it’s great that you can tag people in photos, you must consider the impact of facial recognition on your privacy.
3. Add Location Information
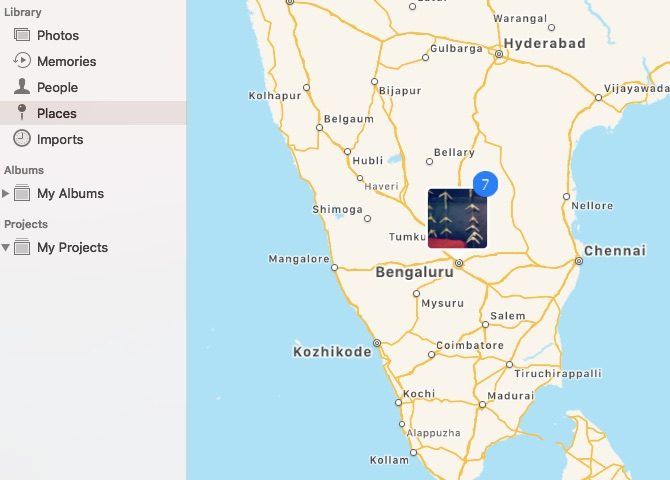
All photos that have a location assigned to them show up on an interactive map in the Places section of the sidebar. Click on the thumbnail that appears for a particular location and you get a grid view of all the photos assigned to it.
Not all photos pick up the location information automatically. For some you’ll have to add it yourself. To do so, start by opening a photo and clicking on the i icon, which you’ll find in the primary toolbar at the top.
You should now see the photo’s Info section in a popup window. Click on the Assign a Location placeholder at the bottom of this window.
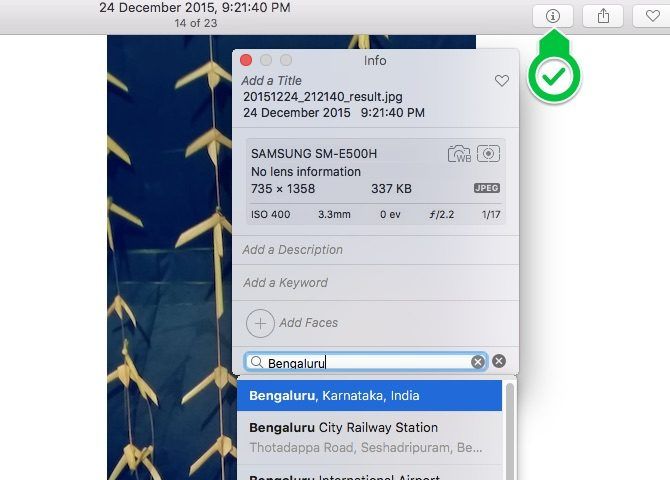
Once you type in a location of your choice and hit Enter, a tiny interactive map with the correct pin shows up right there. Note that you can also add a title, keyword, and a description for the photo from this window.
You can assign a location to photos one at a time or in bulk; the process for both is the same.
4. Turn Albums Into Memories
If you click on Memories in the Photos sidebar, you’ll see that Photos has taken your best shots and turned them into slideshows. With these special compilations you’re sure to rediscover some amazing photos that you’d all but forgotten about.
Apple doesn’t always get the photo selection right though. Hence, you might want to delete a few of the Apple-created memories and turn albums into memories yourself.
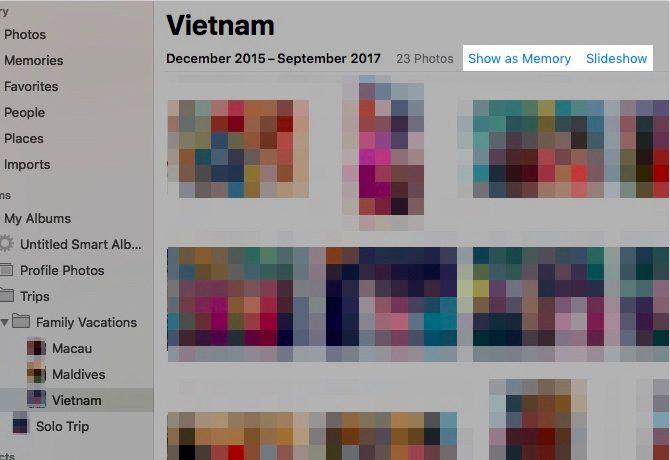
Open any album and click on the Show as Memory link for it to have the album appear under Memories. If you want to view the album as a slideshow without turning it into a memory, click on the Slideshow link instead.
You can also view a bunch of photos as a slideshow. To do so, click on the Play Slideshowoption in the context menu for the group of selected photos.
To play a selected memory, click on its Play button in the top toolbar and then on the Play Slideshow button in the menu that appears. Notice that you can also change the theme and background music for the memory from this menu.
5. Enable Cloud Sync
Backing up your photos to iCloud makes them accessible from any device with an internet connection. You’ll be glad to know that even the edits you make to photos get synced to iCloud.
Ensuring that you have photo backups in multiple locations will help you recover from potential data mishaps without breaking a sweat.
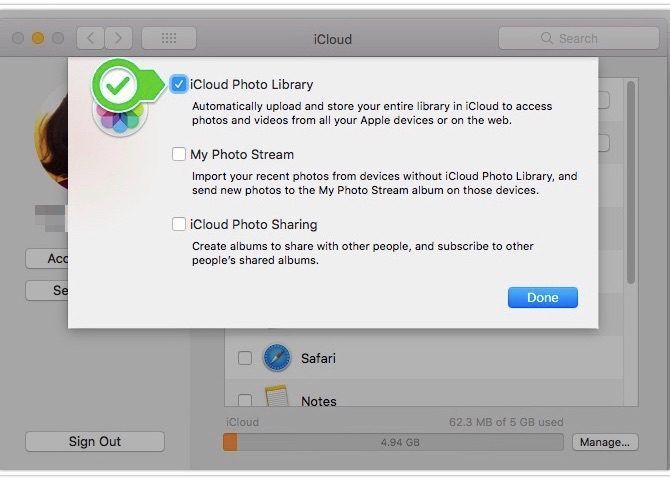
If you would like to use the cloud sync feature for your photo library, head to System Preferences > iCloud. There, click on the Options button next to Photos. Now, in the box that shows up, select the checkbox for iCloud Photo Library and hit the Done button.
(Want to keep your photos off the cloud, but sync them across your Apple devices? In the above step, select the My Photo Stream checkbox instead of the iCloud Photo Librarycheckbox. This two-way sync works only for 1,000 of your most recent photos.)
Keep in mind that Apple allocates only 5GB of free storage space to each iCloud user. If you have a sizeable photo collection to back up, you’re likely to run out of space fast. And sooner or later you’ll need to think about buying more iCloud storage.
Is It Finally Time to Buy More iCloud Storage?Now that iCloud storage costs considerably less than it used to, it might be time to upgrade beyond 5GB.READ MORE
To access your iCloud-synced photos online, you’ll have to visit iCloud.com and log in with your Apple ID.
6. Set Up Smart Albums
A handful of Mac apps allow you to create smart groups to filter items based on one or more criteria. Photos is one of those apps, and it calls these special groups smart albums.
Smart albums come in handy when you want to, say, filter photos that match a certain keyword or feature a specific set of people. You can also use smart albums to isolate pictures that Photos hasn’t been able to sync with iCloud.
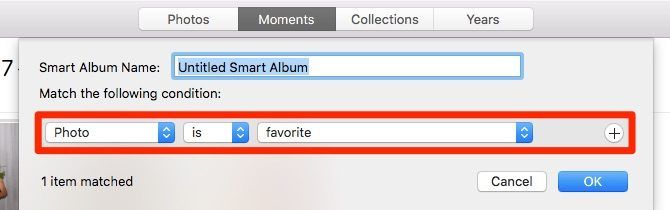
To start setting up a smart album, click on File > New Smart Album. You’ll then get a popup box where you can select conditions for filtering photos from a set of dropdown menus. Once you have these conditions in place, hit the OK button. The album will then show up under My Albums in the sidebar.
7. Repair the Photo Library
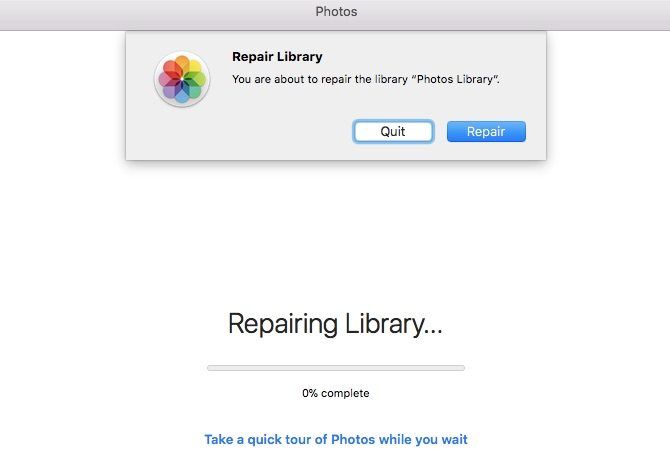
If the Photos app won’t open or if it crashes too often, you can tell macOS to repair it. To do so, hold down the Option and Cmd keys when you’re opening the application.
Once you hit the Repair button in the dialog box that shows up, the built-in repair tool does the rest. It fixes any database problems and inconsistencies to get the Photos app working again.
You might have a bit of waiting to do depending on the size of your photo library. After the repair process is complete, Photos relaunches by itself.
8. Create Photo Books and Calendars

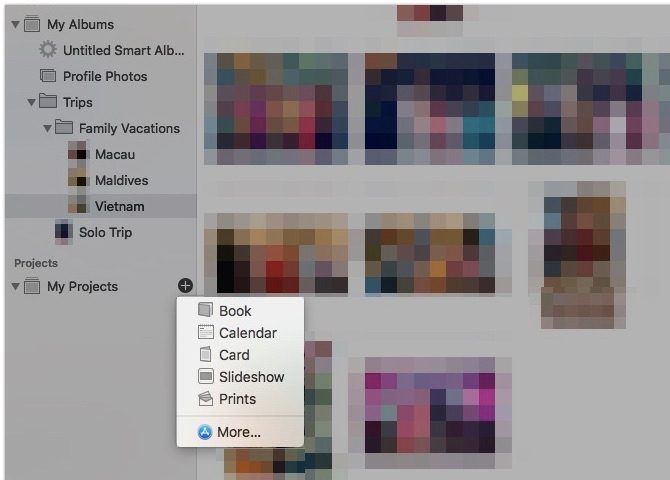
If you want to turn some of your memories into, say, a photo book or a calendar, you can do it right from the Photos app. What’s more, you can have the product delivered to your doorstep. To get started, hover over My Projects in the sidebar and click on the Plus (+)button that appears next to it.
You’ll get a dropdown menu to select the product type you want to see in print. Once you select that, the app takes over. It walks you through the process of picking a theme, adding pictures, editing the layout, and placing the order for the product.
Mac Photo Management Made Simpler
Now that you have a grasp of the basics of Apple Photos on Mac, you’re better prepared to keep your digital memories well organized. Ensure that you aren’t making the usual photo management mistakes, and you’ll be ready to make your photo albums a delight to flip through!
5 Photo Management Mistakes You're Making (and How to Fix Them)Organizing your digital photos can be a chore. And there are some mistakes almost everyone makes. Thankfully, there are also some simple solutions.READ MORESource; www.makeuseof.com