By Andy Betts,
You try to install a new app and the Not Enough Space warning pops up. All those games, photos, and 4K videos have finally taken their toll.
If your phone has a memory card slot, then the solution is easy. A microSD card is a cheap way of expanding your phone’s storage, and you can move apps to an SD card on Android to free up space.
How you do it depends on what Android version you’re using. We’ll take a look at them all in this guide.
Using a microSD Card on Android
Before you get started, consider a few points.
Memory cards are slower than internal storage, so you may notice slightly worse performance for more resource-intensive apps. When picking a card, go for the fastest and largest one your phone can support—check your phone’s specifications to see what cards it’s compatible with.
How to Pick & Buy the Best SD Card for Your NeedsWhat kind of SD card is right for you? Not all of them are the same, after all. Here are the minimum specs you should aim for depending any given activity or need.READ MORE
It isn’t possible to move preinstalled apps without rooting, and even some third-party apps may not support it. Also, on older versions of Android, you might not be able to use widgets associated with apps you’ve moved to your memory card.
With all this in mind, let’s see how to move apps to a microSD card.
Use a microSD Card as Internal Storage
Android Marshmallow introduced changes to the way phones can handle memory cards, and these changes continued into the later versions of Android.
You can now set microSD cards to work as internal storage. Instead of having internal and external storage existing as separate spaces, Android views the card as an extension of the built-in memory.
Data and apps can write to either as needed, and it all happens seamlessly. As a result, you don’t need to worry about where your apps are stored.
You have to set it up first. Your card will be wiped in the process, so make sure you’ve backed up any data you need:
- Insert the card into your phone. When the New SD Card notification appears, tap Set Up.
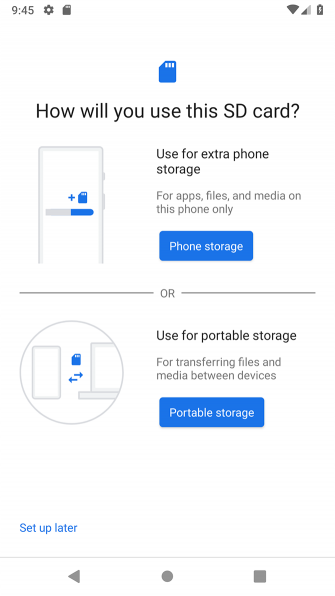
- Next, you need to choose how your phone should use the card. Select Phone Storageon Android 9, or Use as Internal Storage on older versions. Alternatively, go to Settings > Storage, tap the card, tap the menu button, and select Storage Settings. Tap Format as internal.
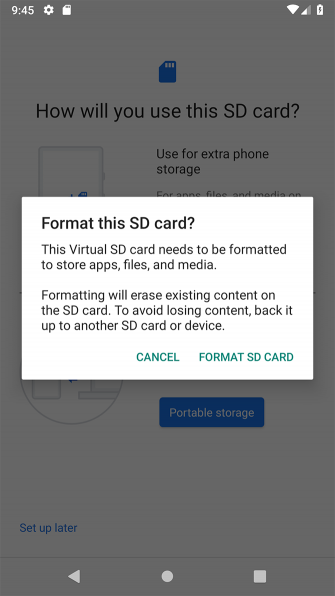
- In the next screen tap Format SD Card, or Erase & Format. This will wipe your card.
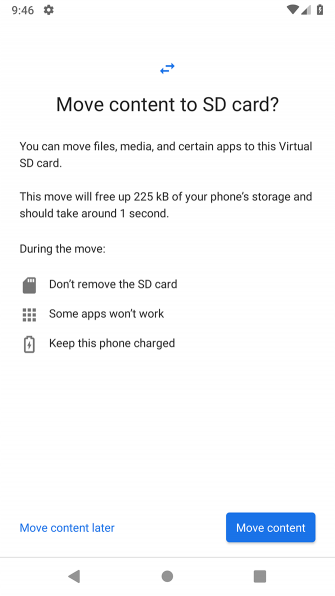
- On Android 9 you’re offered the chance to move your content—including apps—onto the card. It also shows you how much space you’ll save. Hit Move Content to complete.
This feature is called Adoptable Storage, and it requires you to keep your card in your phone permanently. The card is also encrypted, so you cannot put it in another device to copy the data.
The big downside to adoptable storage is that some manufacturers choose not to offer iton their devices. If you don’t have it, then you’ll have to continue moving your apps to your SD card manually.
How Android Differs Depending on the Hardware ManufacturerNot all Android devices are created equal. See how yours stands out from the crowd with our comprehensive guide.READ MOREMove Apps to an SD Card on Android 9.0 Pie
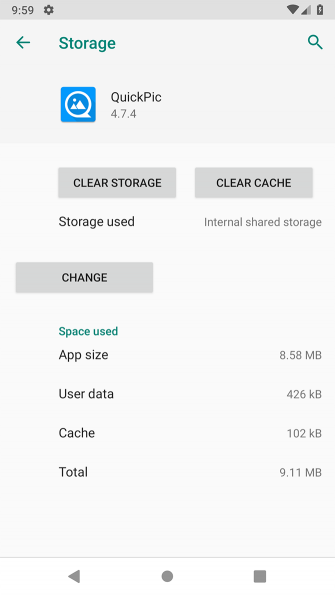
If your phone doesn’t support adoptable storage, it’s quick and easy to transfer apps to an SD card on Android Pie manually. Just remember that you can’t do it for every app, and not at all for the pre-installed apps.
- Go to Settings > Apps & notifications > App info.
- Find the app you want to move in the list and tap it.
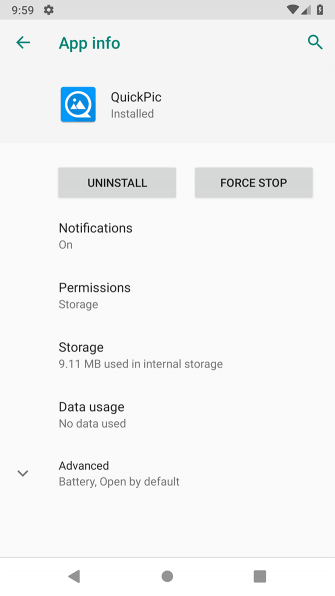
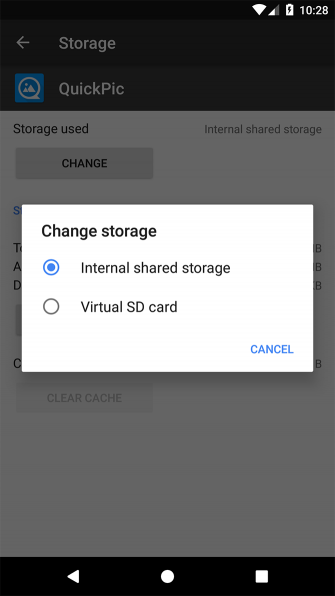
- Select Storage. If the app supports being moved to a card, you’ll see a button here labeled Change. Tap this.
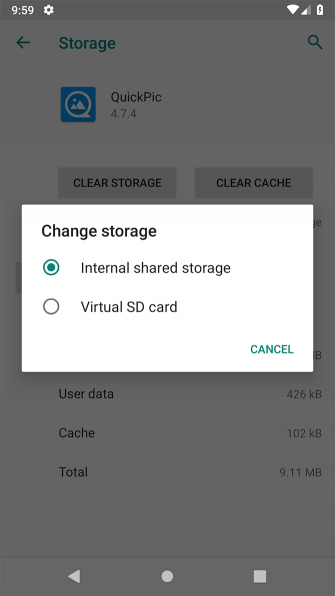
- Select the SD Card in the Change storage dialog box. This brings up a confirmation screen. Tap Move to begin.
To move the app back to internal storage, repeat the steps above but select Internal shared storage in the final step. You should always do this when you want to change or remove your memory card.
Move Apps to an SD Card on Android 8.0 Oreo
The process for moving an app to the SD card on Android 8 is basically the same as for Android 9:
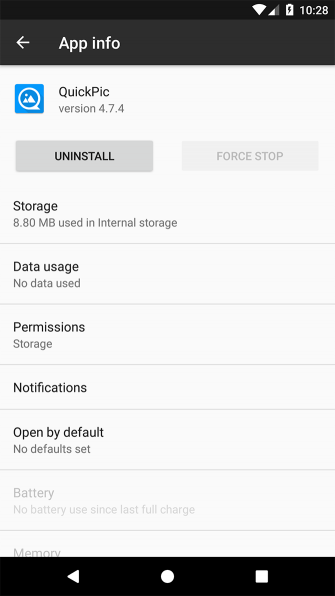
- Go to Settings > Apps & notifications > App info.
- Scroll down to find the app you want to move to the card and tap on it.
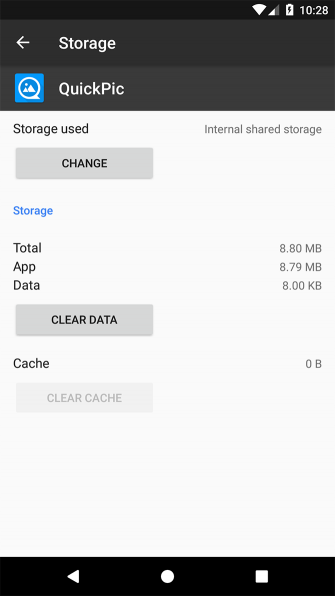
- Select Storage. If the app supports being moved to a card, you’ll see a section labeled Storage used. Hit the button marked Change.
- Select the card you want to move the app to, followed by Move.
Move Apps to an SD Card on Android 7.0 Nougat
You can move apps to a memory card on Android 7.0 Nougat through Settings. However, you can’t move all apps, and where they don’t support it, you won’t see the Change button in Step 3.
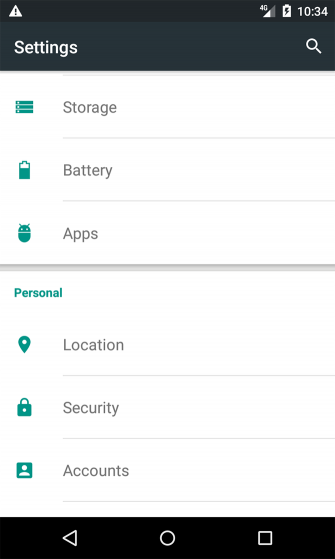
- Go to Settings > Apps.
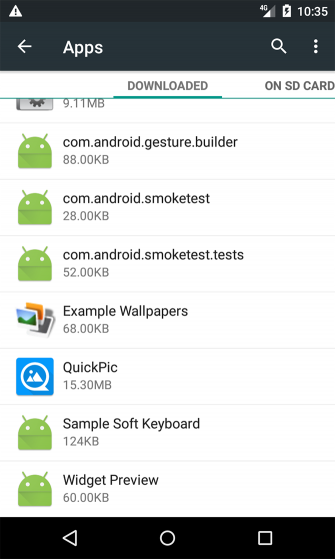
- Locate the app you want to move to your microSD Card and tap on it.
- Go to Storage > Change and choose your card from the prompt box that opens.
- Tap Move to complete the process.
Depending on the size of the app, it may take a few moments to complete (especially in the case of large games), so don’t touch your phone until it’s done. To move the app back, repeat the steps and choose Internal shared storage in Step 3.
Move Apps to an SD Card on Android 6.0 Marshmallow
Moving apps to a microSD card is the same on Marshmallow as it is on Nougat.
- Go to Settings > Apps then tap on your chosen app.
- Tap Storage > Change then choose the card when prompted.
- Hit Move to complete the process.
Move Apps to an SD Card on Android 5.0 Lollipop
Lollipop has less robust support for memory cards than later versions of Android, but you can still move apps from within Settings.
You’re limited in which apps you can place in your external storage; it depends on the developer supporting the option. Also, the entire app doesn’t move across to the card either—only part of it does.
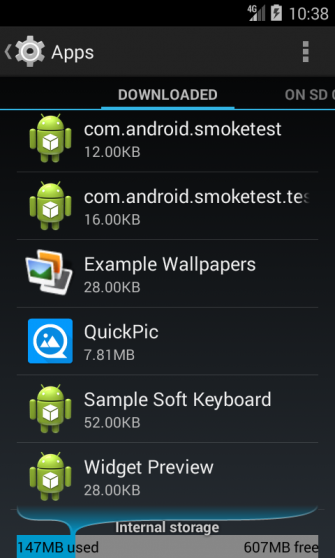
You can see which apps you’ve got on your card by swiping to the right hand tab in the Appscreen, labeled On SD Card. This makes it easy to identify any that you may wish to move back in the future.
To move apps:
- Go to Settings > Apps and tap the app you want to move to your SD card.
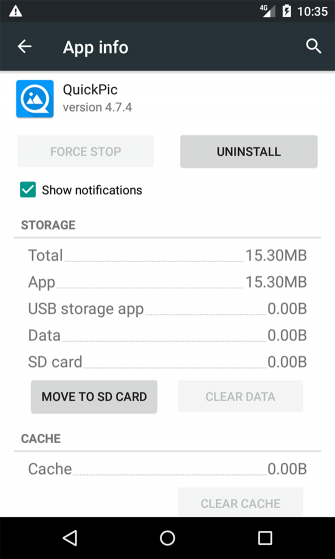
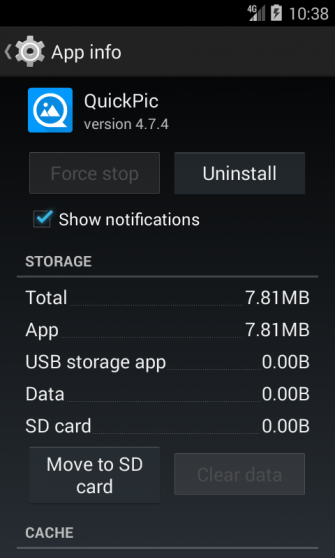
- Next, under the Storage section, tap Move to SD Card. The button will be grayed out while the app moves, so don’t interfere until it’s done.
- If there’s no Move to SD Card option, the app cannot be moved.
Once it’s done, the Storage section will update to show how much of the app is now stored on the card (and how much is still in internal storage). The Move button will now read Move to Phone or Move to Device Storage. Tapping on this enables you to remove the app from the card.
Move Apps to an SD Card on Android 4.x and Earlier
Support for microSD cards was extremely limited in all Android 4.x versions (including KitKat, Jelly Bean, and Ice Cream Sandwich). Stock Android didn’t support the ability to move apps to an external card at all, as Google seemed intent on phasing cards out entirely. However, some manufacturers did opt to include the feature in their own versions of the operating system.
If your older device supports it, the process is straightforward:
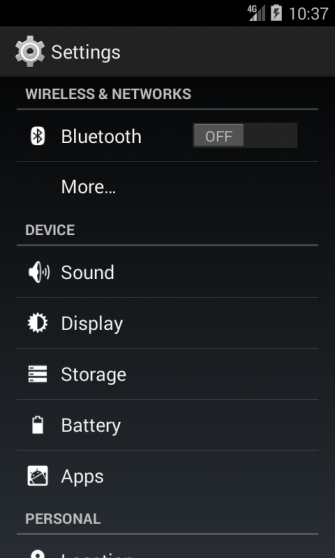
- Go to Settings > Apps.
- Next, locate and tap the app you want to move to the card.
- Select Move to SD card. If this button isn’t available, you can’t move the app (or your phone doesn’t support doing so).
In the unlikely event that you’re still using an Android 2.x device, these steps are roughly the same ones you’ll encounter. Home screen widgets are not supported in these old versions—you’ll need to keep an app in internal storage if you want to use a widget.
If you don’t have the option on your phone, then you’ll need to look into a third-party app.
Move Apps to an SD Card Using Link2SD
If your phone doesn’t support moving apps to the SD card, or if you want to move an app that doesn’t support it individually, there are a few third-party apps that can help you out. Apps2SD is a popular option, as is FolderMount. Both require a rooted Android phone.
The Complete Guide to Rooting Your Android Phone or TabletSo, you want to root your Android device? Here's everything you need to know.READ MORE
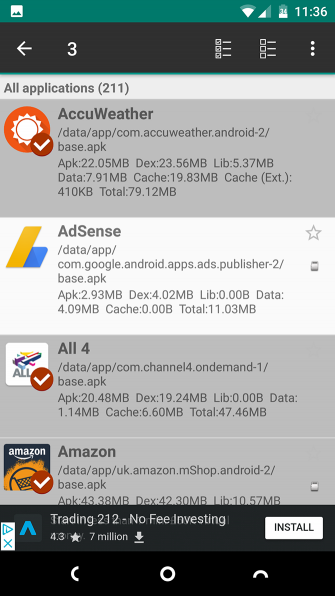
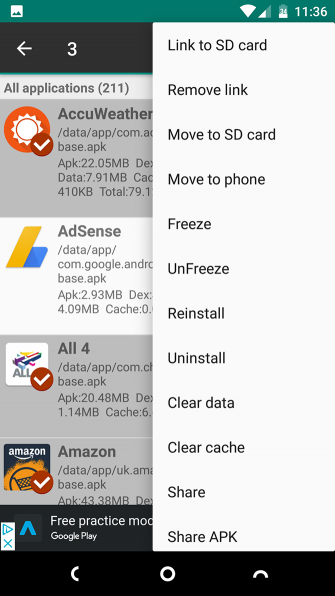
We’re going to look at another choice, Link2SD, which has both root and non-root features. You can use it to move apps to your card in bulk, to “force-move” apps that don’t normally allow it, and to offload data folders for larger apps and games to your external storage.
First, launch the app and grant root permissions if your phone is rooted. Then tap the app you want to move and select an option:
- Link to SD Card. This requires root and moves the entire app and its data to your card.
- Move to SD Card. This doesn’t require root and only works if your phone supports moving apps to external storage. If you do have root, you can also force-move apps that don’t otherwise support it..
- Link to SD Card (Data and Cache). Moves data files, and requires root.
To move more than one app at a time, tap the menu button in the top right-corner and choose Multi-select. Now tap all the apps you want to move, hit the menu button again, and choose either Link to SD card or Move to SD card. These are the same options as described above.
Link2SD is free, with a paid upgrade. It works on Android 2.3 and up.
Download: Link2SD (Free) | Link2SD Plus ($2)
The Best Way to Move Apps on Android
The best way to install apps on your microSD card depends on what version of Android you’re using, whether your phone’s manufacturer has implemented all the features, and what app you want to move.
In summary:
- On phones that support adoptable storage, that’s the best choice. It removes any need to manage your card manually.
- For phones that support moving apps to the card manually, that method is best and cleanest.
- If your phone doesn’t support any of this, or if you have specific requirements, consider rooting and using Link2SD.
If your apps are taking up too much space, another good solution is to use the new range of Android Go apps instead. Not only are they smaller and take up less space, but they run faster on older or less powerful phones too.
7 Lightweight Android Go Apps to Save Storage Space and MemoryGoogle's new Android Go apps provide lightweight alternatives to Maps, YouTube, and more. Here's what you should know and how to try them now.READ MORE